🚀 Azure Virtual Machine – End-to-End Practical Tutorial
What you’ll build
By the end, you will:
- Run a secure Linux VM
- SSH using key-based auth
- Serve traffic via Nginx
- Harden the VM (SSH + firewall)
- Create a VM Scale Set
- Enable autoscaling
- Perform rolling updates (zero downtime)
🧱 Architecture (Mental Model)

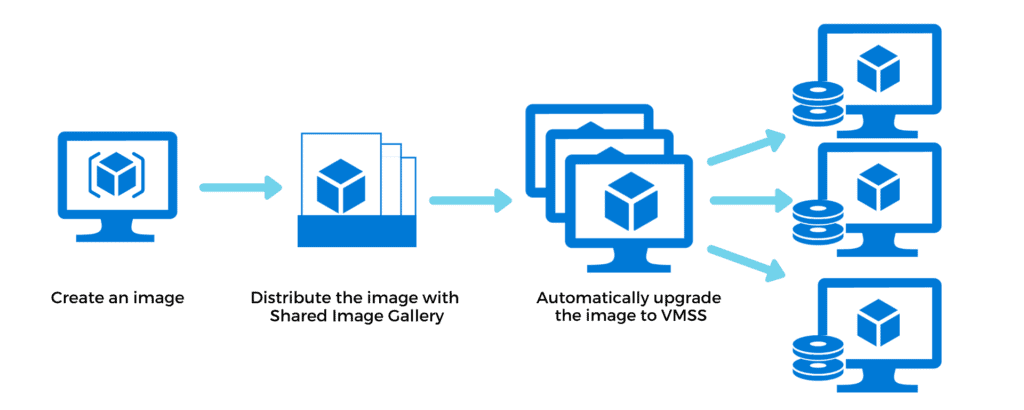
Internet
   |
Azure Load Balancer
   |
VM Scale Set
 ├─ VM Instance 1 (Nginx)
 ├─ VM Instance 2 (Nginx)
 └─ VM Instance N (Auto-scaled)
1️⃣ Create a Linux VM (Ubuntu)
🔐 Create SSH key (local machine)
This creates:
azure_vm_key(private)azure_vm_key.pub(public)
☁️ Create Resource Group
🖥️ Create Linux VM
az vm create \
  --resource-group rg-azure-vm \
  --name demo-vm \
  --image Ubuntu2204 \
  --size Standard_B2s \
  --admin-username azureuser \
  --ssh-key-values ~/.ssh/azure_vm_key.pub \
  --public-ip-sku Standard
📌 Why these choices
Ubuntu2204→ LTS & stableStandard_B2s→ cheap + enough for learning- SSH keys → passwordless & secure
2️⃣ SSH into VM using Key
✔️ You are now inside the VM.
3️⃣ Install & Verify Nginx
Enable and start:
Check:
🌐 Open Port 80 (HTTP)
Open browser:
✅ Nginx default page should load.
4️⃣ Harden the VM (Very Important 🔒)
🔑 Disable password login & root login
Change / ensure:
Restart SSH:
🔥 Enable Firewall (UFW)
✔️ Now:
- Only SSH + HTTP allowed
- Password login disabled
- Root login disabled
5️⃣ Create a VM Scale Set (VMSS)
VMSS = multiple identical VMs + auto-healing + auto-scaling
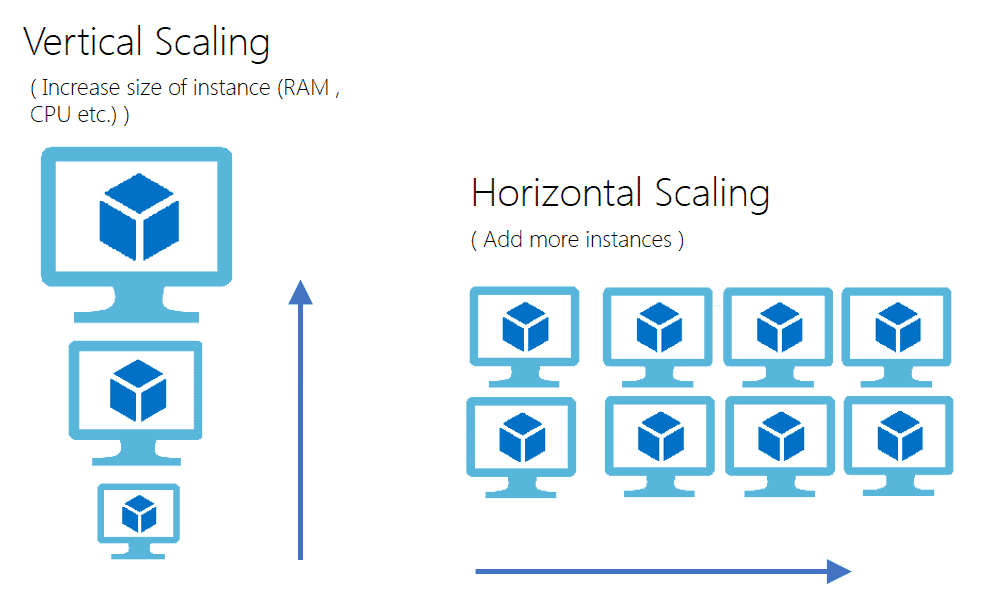

Create VMSS
az vmss create \
  --resource-group rg-azure-vm \
  --name web-vmss \
  --image Ubuntu2204 \
  --instance-count 2 \
  --admin-username azureuser \
  --ssh-key-values ~/.ssh/azure_vm_key.pub \
  --upgrade-policy-mode Rolling \
  --load-balancer web-lb
📌 Automatically creates:
- Load Balancer
- Backend pool
- 2 VM instances
6️⃣ Install Nginx on VMSS (Custom Script)
Create script
#!/bin/bash
apt update
apt install -y nginx
systemctl enable nginx
systemctl start nginx
echo "Hello from $(hostname)" > /var/www/html/index.html
Apply script to VMSS
az vmss extension set \
  --resource-group rg-azure-vm \
  --vmss-name web-vmss \
  --name customScript \
  --publisher Microsoft.Azure.Extensions \
  --settings '{"fileUris":[],"commandToExecute":"bash nginx-install.sh"}'
🌍 Access via Load Balancer IP
az network public-ip show \
  --resource-group rg-azure-vm \
  --name web-lb-ip \
  --query ipAddress -o tsv
Open in browser → traffic rotates between VMs.
7️⃣ Configure Autoscaling Rules
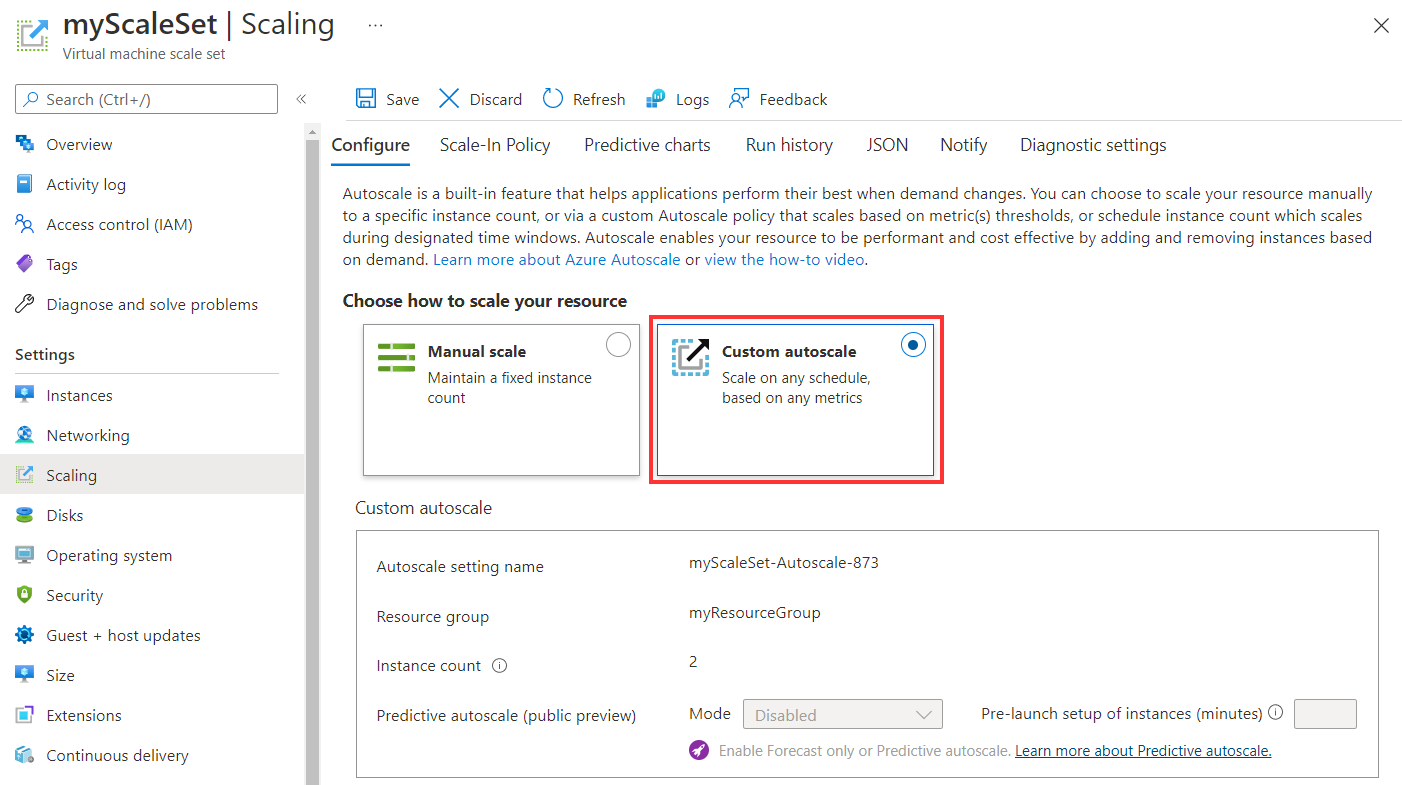
Create autoscale profile
az monitor autoscale create \
  --resource-group rg-azure-vm \
  --resource web-vmss \
  --resource-type Microsoft.Compute/virtualMachineScaleSets \
  --name vmss-autoscale \
  --min-count 2 \
  --max-count 5 \
  --count 2
Scale OUT (CPU > 70%)
az monitor autoscale rule create \
  --resource-group rg-azure-vm \
  --autoscale-name vmss-autoscale \
  --condition "Percentage CPU > 70 avg 5m" \
  --scale out 1
Scale IN (CPU < 30%)
az monitor autoscale rule create \
  --resource-group rg-azure-vm \
  --autoscale-name vmss-autoscale \
  --condition "Percentage CPU < 30 avg 5m" \
  --scale in 1
8️⃣ Perform Rolling Updates (Zero Downtime)
Rolling upgrade ensures:
- One VM updates at a time
- Traffic continues flowing
Change HTML content
Apply update
az vmss extension set \
  --resource-group rg-azure-vm \
  --vmss-name web-vmss \
  --name customScript \
  --publisher Microsoft.Azure.Extensions \
  --settings '{"fileUris":[],"commandToExecute":"bash nginx-install-v2.sh"}'
✔️ Azure updates VMs one by one ✔️ No downtime ✔️ This is how production deployments work
✅ Final Checklist
✔ Linux VM created ✔ SSH with key ✔ Nginx installed ✔ VM hardened ✔ VM Scale Set created ✔ Autoscaling enabled ✔ Rolling updates performed
🧠 What You Just Learned (Interview Gold)
- Difference between VM vs VMSS
- Secure Linux VM setup
- Production-grade autoscaling
- Zero-downtime deployments
- Azure Load Balancer behavior